
10 Easy DIY Home Improvement Projects for Beginners in 2024
Discover 10 easy DIY home improvement projects perfect for beginners in 2024. Transform your space with simple, budget-friendly ideas and step-by-step guides.
Are you ready to give your home a fresh look without breaking the bank? Whether you're a DIY novice or just looking for quick and easy projects, these 10 simple home improvement ideas are perfect for beginners. In this guide, we'll explore projects that require minimal tools, effort, and time, allowing you to make a big impact on your living space. Plus, we've included handy tips and tricks to ensure your DIY journey is smooth and successful!
1. Refresh Your Walls with a New Coat of Paint
- Choose the right paint color for your space.
Selecting the perfect paint color is crucial to setting the mood and enhancing the aesthetics of your room. Consider factors such as natural light, room size, and existing décor to ensure your choice complements the space. Utilize color swatches and test samples on your walls to see how they look at different times of the day. - Step-by-step painting guide for beginners.
Painting your walls can be an easy and rewarding DIY project with the right guidance. Start by gathering all necessary tools, including brushes, rollers, painter’s tape, and drop cloths. Prepare the walls by cleaning and priming them before applying paint. Follow a systematic approach, painting edges and corners first, then moving to larger surfaces for a smooth, even finish. - Tips on achieving a professional finish.
To achieve a flawless, professional-looking finish, attention to detail is key. Ensure even coats by not overloading your roller with paint and using consistent pressure while painting. Avoid streaks by rolling in a "W" pattern and blending the paint as you go. Finally, inspect your work for any missed spots or imperfections and touch up as needed to perfect the final look.
2. Why Lighting Matters in Home Improvement
Lighting plays a pivotal role in transforming the ambiance and functionality of your home. Proper lighting not only enhances the aesthetic appeal of your space but also improves visibility and creates a welcoming atmosphere. Whether it's accent lighting to highlight artwork, task lighting for kitchens and offices, or ambient lighting to set the mood, the right choice can make all the difference in your home improvement projects.
- How to Replace or Install New Fixtures
Installing new light fixtures can be a straightforward DIY task that significantly upgrades your space. Begin by turning off the power to the fixture at the circuit breaker to ensure safety. Remove the old fixture and disconnect the wires carefully. Follow the instructions that come with your new fixture for connecting the wires, mounting it securely, and testing the new installation. Whether you’re swapping out an old fixture or adding something new, attention to detail is key for both functionality and aesthetics.
- Budget-Friendly Lighting Ideas
You don’t have to break the bank to achieve stunning lighting in your home. Consider energy-efficient LED bulbs, which save money in the long run. Use floor lamps or table lamps to add layers of light and create a cozy atmosphere. String lights or battery-operated candles can add a warm, decorative touch to any room. For a more modern feel, consider installing dimmer switches to adjust the brightness according to your needs, giving you control over the mood and energy consumption of your space.
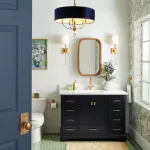
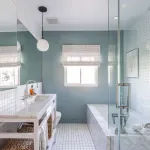
3. Easy ways to transform your kitchen or bathroom.
Updating your kitchen or bathroom doesn't have to involve a major renovation. Installing a peel-and-stick backsplash is an easy and cost-effective way to give these spaces a fresh, modern look. With a variety of designs available, from sleek subway tiles to intricate mosaics, you can quickly transform the overall vibe of your room without the mess or expense of traditional tiling.
- Guide to choosing and applying peel-and-stick tiles.
Selecting the right peel-and-stick tiles involves considering the material, pattern, and color that will best complement your existing decor. Measure the area you want to cover to ensure you purchase the correct amount. When applying the tiles, make sure the surface is clean, dry, and smooth to ensure strong adhesion. Begin from the center of the area and work your way out, pressing firmly to eliminate air bubbles and ensure a secure fit. - Best practices for a seamless look.
To achieve a professional, seamless finish with your peel-and-stick backsplash, plan your layout before starting. Cut tiles carefully to fit around edges and outlets, using a sharp utility knife. Pay attention to alignment and spacing to avoid gaps or uneven lines. Once installed, use a rolling pin or a tile roller to press the tiles evenly, ensuring they adhere firmly to the wall for a polished, long-lasting look.
4. Create a Gallery Wall
- How to select and arrange artwork.
Choosing the right pieces for your gallery wall is essential to creating a cohesive and visually appealing display. Start by selecting a mix of artwork, photos, and prints that reflect your personal style and the overall theme of the room. Consider varying the sizes and orientations of the pieces for visual interest. Lay out your selections on the floor first to experiment with different arrangements until you find the perfect balance. - Tools needed to create a professional gallery wall.
To achieve a professional-looking gallery wall, you'll need a few essential tools. A tape measure and level will help ensure your pieces are hung evenly and at the correct height. Picture-hanging hardware, such as hooks or nails, is necessary for secure installation. Painter’s tape can be used to map out your arrangement on the wall before you start hammering, and a pencil will allow you to make light marks for precise placement. - Tips for hanging pictures evenly.
Hanging pictures evenly is key to creating a polished gallery wall. Start by establishing a central focal point, such as a larger piece, and arrange the rest of the artwork around it. Use a level to ensure each piece is straight, and maintain consistent spacing between the frames. If you’re using different sizes of artwork, keep the center of each piece aligned to create a harmonious and balanced display.
5. Revamp Your Cabinets with New Hardware
- The impact of new cabinet handles and knobs.
Swapping out old cabinet handles and knobs for new ones can have a transformative effect on the look and feel of your kitchen or bathroom. This simple update can modernize your space, add a touch of elegance, or even create a bold statement. By selecting hardware that complements your cabinetry, you can instantly elevate the overall aesthetic and refresh the room’s design without the need for a full renovation. - How to choose the right hardware style.
Choosing the right cabinet hardware involves considering the style of your cabinets and the overall theme of your space. For a modern look, sleek, minimalist handles in brushed nickel or matte black are popular choices. If you’re aiming for a more traditional or rustic vibe, consider ornate knobs or antique brass finishes. Don’t forget to match the size and scale of the hardware with the dimensions of your cabinets to ensure a balanced appearance. - Installation guide for beginners.
Installing new cabinet hardware is a straightforward DIY project that even beginners can tackle. Start by removing the old hardware and filling any holes that won’t be reused. Measure and mark the spots for your new handles or knobs, ensuring they are aligned correctly. Use a drill to create holes for the screws, then attach the hardware securely. Double-check that everything is level and firmly in place to achieve a professional finish.
6. Build Simple Floating Shelves
- Why floating shelves are a great DIY project.
Floating shelves are a versatile and stylish addition to any room, offering both function and aesthetic appeal. They are an excellent DIY project for beginners because they require minimal materials and can be customized to fit your space. Whether you need extra storage in the kitchen, a display area in the living room, or a sleek solution for a home office, floating shelves provide a modern, clutter-free look without taking up floor space. - Materials and tools you'll need.
To build and install floating shelves, you’ll need a few basic materials and tools. Essential items include wood for the shelves, brackets or mounting hardware, screws, wall anchors, a level, a drill, and a saw. Depending on your design, you may also need wood glue, sandpaper, and a finish like paint or stain to give the shelves a polished look. Ensure you select materials that can support the weight of the items you plan to display. - Step-by-step instructions to build and install.
Start by measuring and cutting your wood to the desired length. Sand the edges for a smooth finish, then stain or paint the wood if desired. Attach the mounting hardware to the wall, ensuring it’s level and securely anchored. Next, mount the brackets or shelf supports to the wall, following the manufacturer’s instructions. Finally, place the shelves on the brackets and secure them with screws, making sure everything is level and sturdy. With careful planning and execution, you’ll have beautiful, functional floating shelves that enhance your space.
7. Add a Pop of Color with Accent Walls
- The benefits of accent walls in home design.
Accent walls are a powerful tool in home design, allowing you to create a focal point that adds depth and character to a room. By introducing a contrasting color or pattern, accent walls can break up the monotony of a single-color scheme and make a bold statement without overwhelming the space. They can also be used to highlight architectural features, define different areas within an open-plan layout, or simply inject a burst of personality into your home. - Choosing the right wall and color.
Selecting the right wall and color for your accent wall is crucial for achieving the desired effect. Typically, the best wall to accentuate is one that naturally draws attention, such as the wall behind a bed, a fireplace, or a large piece of furniture. When it comes to color, consider the existing palette in the room and choose a shade that complements or contrasts effectively. Bold colors like deep blues, rich greens, or vibrant reds can add drama, while softer tones like pastels can create a calming effect. - How to paint or apply wallpaper for an accent wall.
Creating an accent wall is a manageable project whether you choose to paint or apply wallpaper. For painting, start by prepping the wall: clean it thoroughly, patch any holes, and apply a primer if necessary. Use painter’s tape to protect the edges and corners, then apply your chosen color in even coats, allowing each layer to dry fully. If wallpapering, measure and cut the wallpaper to fit the wall, then apply adhesive to the wall or paper, depending on the type. Carefully smooth the wallpaper onto the wall, aligning patterns and removing air bubbles for a flawless finish.
8. Install a New Faucet
- How a new faucet can transform your kitchen or bathroom.
Installing a new faucet can instantly revitalize your kitchen or bathroom, giving the space a modern and updated look. Whether you’re opting for a sleek, minimalist design or a more traditional style, a new faucet can enhance the overall aesthetic and functionality of the room. With options like pull-down sprayers, touchless technology, and various finishes, the right faucet can also improve the convenience and efficiency of your daily routines. - Tools required for installation.
To replace your old faucet with a new one, you’ll need a few essential tools: an adjustable wrench, basin wrench, plumber’s tape, bucket, and a screwdriver. Depending on your specific faucet model, you may also need additional items like sealant, plumber’s putty, or supply lines. Having these tools on hand will ensure a smooth and efficient installation process. - Step-by-step guide to replacing your old faucet.
Begin by turning off the water supply to the faucet and placing a bucket underneath the sink to catch any residual water. Use the adjustable wrench to disconnect the water supply lines from the faucet. Next, remove the old faucet by loosening the mounting nuts underneath the sink using a basin wrench. Once the old faucet is removed, clean the sink area to prepare for the new installation. Position the new faucet into place, securing it with mounting nuts. Reconnect the water supply lines, using plumber’s tape on the threads to prevent leaks. Finally, turn on the water supply and test the faucet for any leaks, making adjustments as needed.
9. Upgrade Your Window Treatments
Upgrading your window treatments can dramatically change the look and feel of a room, adding style, privacy, and light control to your space.
Beginners should take precise measurements and ensure the mounting hardware is securely installed to support the weight of the window treatments.
- Different types of window treatments to consider.
When upgrading your window treatments, there are several options to choose from, each offering a unique blend of style and functionality. Curtains and drapes add a touch of elegance and can range from light, airy sheers to heavy, insulating fabrics. Blinds and shades, available in materials like wood, bamboo, or fabric, offer more control over light and privacy. Shutters provide a classic look with adjustable louvers for light control, while valances and cornices can add decorative flair to any window. - How to measure and install curtains or blinds.
Accurate measurements are crucial for a perfect fit when installing new window treatments. For curtains, measure the width and height of your window, adding extra width if you prefer a fuller look. For blinds, measure the inside width and height of the window frame for an inside mount, or the outside dimensions if you want the blinds to cover the frame. Installation is straightforward: for curtains, install the rod brackets at your desired height and hang the curtains. For blinds, follow the manufacturer's instructions to secure the mounting brackets, insert the blinds, and attach any finishing hardware. - Styling tips for a polished look.
Achieving a polished look with your window treatments involves a few simple styling tips. For curtains, consider the length—floor-length curtains create a luxurious feel, while curtains that just touch the sill can look crisp and modern. Layering curtains with sheer panels can add depth and texture. When choosing blinds, ensure they complement the room’s decor and consider coordinating them with the color of your window trim. Adding decorative elements like tiebacks, finials, or a coordinating valance can enhance the overall aesthetic, giving your windows a finished, cohesive look.
10. Create a Cozy Outdoor Space
Transforming your outdoor space into a cozy retreat is a rewarding project that allows you to enjoy and relax in your yard, patio, or balcony with style and comfort.
Creating a cozy outdoor space is an opportunity to express your personal style while enjoying nature. Look for inspiration online or in magazines, and remember that even small changes can make a big difference in the overall feel of your space.
- Simple ideas to enhance your outdoor living area.
Transforming your outdoor space into a cozy retreat doesn’t require a major overhaul. Start by adding comfortable seating, such as cushioned chairs, loungers, or a hammock, to encourage relaxation. Incorporate elements like outdoor rugs, throw pillows, and string lights to create a warm and inviting atmosphere. Adding greenery through potted plants or a small garden can also bring life and color to your space, making it feel like an extension of your indoor living area. - DIY projects for patios, decks, and gardens.
Enhancing your outdoor space with DIY projects is both rewarding and cost-effective. Consider building a simple wooden bench or creating a custom fire pit to make your patio or deck more functional. DIY planters, garden beds, or trellises can add visual interest and help you personalize your garden. You can also craft outdoor decor, like handmade lanterns or bird feeders, to give your space a unique and personal touch. - Budget-friendly ways to add comfort and style.
You don’t have to spend a lot to make your outdoor space comfortable and stylish. Upcycle old furniture with a fresh coat of paint or new cushions to give it a new lease on life. Use inexpensive outdoor fabrics to create custom cushions, tablecloths, or shade sails. Thrift stores or online marketplaces can be great places to find budget-friendly decor items like lanterns, pots, or even outdoor furniture. Finally, consider using solar-powered lights to create a cozy ambiance without adding to your electricity bill.
Conclusion
Now that you've got these 10 easy DIY home improvement projects under your belt, it's time to roll up your sleeves and get started! Whether you're painting a wall or installing new hardware, each project offers a great opportunity to enhance your home while building your DIY skills. Don't forget to share your results with us and inspire others with your creativity. Happy DIYing!
Similar Posts


Want To Be A Piece Of Us?
We give a chance for people to work in the professional environment with challenges and values. Come with us!